Showing posts with label Crafts. Show all posts

Wednesday, May 23, 2012

I Heart the Little Moments

I added a little glam to this glass vanilla bottle and I plan to fill it with little sprigs from the garden.

Life has smoothed out a bit and we're sailing into summer. Unhurried mornings. Lots of time outside. Bike rides. Time to breathe. As my margin of free time has increased in these last couple of days, I find myself noting and taking pleasure, and sometimes finding humor, in the little things. I've loved seeing my oldest son's heart for God and for other people shining forth lately. I've also gotten a kick out of him discovering that if we comb and spray his hair in the morning, his hair will look good all day long. I think it's a small admission that Mom may know a thing or two. I've also loved seeing my boys re-discover the freedom of wearing flip flops because I think their little bare feet are so cute. At the same time, those little toes can pack a wallop that stinks up an entire room. My middle C grudgingly went to wash his feet before bed last night and came back flip flopping with a sheepish grin on his face because he had to acknowledge the absolute necessity of washing his feet. Funny. And again, perhaps a small nod towards Mom and Dad knowing what they're talking about. I've loved seeing our two oldest boys learning to play the piano with their Ma K (my mom-in-law.) They each played a duet with her yesterday and that was really cool. Before my oldest son played, my mom-in-law warned me that her part was written in a chord that didn't sound good so the duet wasn't going to sound great. They played and I heard what she meant; it was a bit discordant. But as soon as they finished, my youngest C said, "That was awkward." Funny boy. He's got a quick wit and he keeps us entertained. He'll sometimes call me "mi rosa", "my rose" in English. He started doing it again yesterday, and I love it. A sweet sentiment but it's really all in his delivery. He bends his body over in half and then comes up and flings his arms up the air as he says, "mi rosa!" Adorable, funny and utterly unique. Yes, these are the little moments that fill my heart and my life.


Tuesday, May 1, 2012

Nesting Dolls

Aren't these Matryoshka nesting dolls that you decorate yourself just too cute?


Thank you Eat Drink Chic for the introduction to Blank.

Wednesday, March 28, 2012

A Trio of Stamps

I don't always have time to stamp cards but I'm quite sure I'd make time for these stamp sets from Yellow Owl Workshop. It was hard to narrow down but this Trio of stamp sets strikes my fancy...


Thursday, March 22, 2012

Crazy About Craft Paper

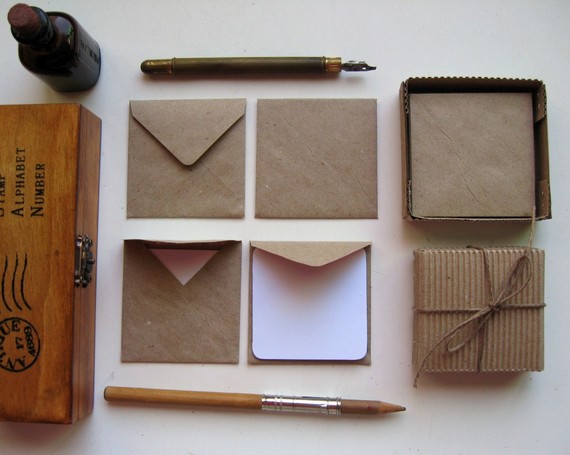
I love craft paper. I use craft paper cardstock for making greeting cards and business cards. We've used craft paper on the roll a number of times for our boys' birthday parties. One year, we covered the table in craft paper and had the boys and their guests draw a scene from Star Wars. Another year, we drew a life-sized football player on craft paper, hung it up; and had everyone "pin" a football onto him while blindfolded for a fun twist on a classic game. Another year, we drew a treasure map on the craft paper for an Indiana Jones themed party and used it as a tablecloth and later artwork for their room. I also keep craft paper bags on hand for those times when I need a quick gift bag. I simply make a little decorative tag and attach it to the bag with pretty ribbon and I'm good to go. And how fun would it be to receive a package in the mail that was wrapped in craft paper and tied with string? Whether plain or patterned, craft paper is so versatile and has a timeless quality to it. Here are some lovely images of craft paper as well as links to a couple of fun tutorials. Enjoy!

Brown Dress with White Dots
Oh Hello Friend
Be sure to check out this tutorial on creating your own polka dot paper.
Craft Paper Tags

Inky Co.
Check out the tutorial for this paper wreath from Hello! Lucky.

Wednesday, January 4, 2012

All For the Boys...Yes!!!


This mom of all boys is soooooo excited to have come across All For The Boys, a creative website dedicated to boys. I've just started browsing it and I am so impressed. It really can be hard to come up with boy-friendly crafts and ideas so I'm thrilled to have this great resource. Some projects that caught my eye: the above handmade mini bow and arrow that works, lots of Star Wars projects that will delight my boys, ideas for Legos, cute little notes to download and place in lunch boxes.

One thing that I'm inspired to begin immediately is interviewing my 3Cs using this interview form (look for the 2012 version.) It'll be a fun and simple way to take a snapshot of my boys each year. As anyone who has ever worked with me on a team knows, I love to ask team building/family time questions. So this idea is right up my alley. I think it would be so cool to look back over the years and see how your children's answers change (or not) as they get older. I can't wait to get started. I hope you find some inspiration for your little ones too.

Friday, December 2, 2011

A Trio of Wreaths

Here are some Christmas wreaths that caught my eye...


Bloesem Kids

 Etsy via Pinterest

Have you started your Christmas decorating yet? We've been sick this week but I'm hoping to get some decorations up soon. If you click on the Bloesem Kids link above, you'll find instructions for making this wreath with your kiddos, which would be a fun little project for the weekend. We're expecting a winter storm this weekend so we'll be mostly staying in. I hope to tackle a few projects...but maybe we'll settle for snuggling on the couch with cups of cocoa and tea and watching some movies. Whatever your weekend brings, I hope it is delightful. 

Thursday, November 3, 2011

Paper Paper Paper!

I love all things paper...making cards, crafting projects, etc. Here's an example of the boxes I made to fit the creations from my shop:
You can find such a wide variety of beautiful scrapbooking paper these days, which is what I used here. I've also gotten into downloading paper items that you can create. A favorite stopping place for me for free downloads, both paper items and typography, is How About Orange. Her blog is full of creative inspiration and good laughs. Today, she has this free download from a cute shop on Etsy:
You can get it here. It's nice to have a quick and cute option for making cards on the go. Happy card making! 

Wednesday, October 19, 2011

Crafting Lil' Pumpkins

Last Fall, my Aunt A showed me how to make this lil' pumpkin...

It's such a cute little guy in its classic colors of orange and green. This year, I decided to add in a little sparkle and mix up the colors. 
In order to make your own lil' pumpkins, read the instructions below. 

What You Need
  • Cardstock paper in the color of  your choice
  • Scalloped 1 3/4" punch (OR - use a plain circle punch - OR - draw your own circles using a stencil or jar lid)
  • Cinnamon sticks (OR - use a small branch or chenille sticks)
  • Glue
  • Scissors
I used a 1 3/4" scalloped punch.
Fold each circle in half, right-side to the inside.
Once all the circles are glued together, flatten and snip the bottom edge.

Instructions

  1. Punch 8 scalloped circles out of your cardstock (a 6" square is big enough for all 8 1 3/4" circles.)
  2. Fold each circle in half with the decorative side on the inside. If using the scalloped punch, make sure you fold in such a way that your rounded edges line up and there are no pointed edges. (See above)
  3. Glue the folded-in-half circles together, one at a time until all eight are glued in a stack. Let the glue dry for a few moments.
  4. Glue the last two circles together, completing the round pumpkin shape.
  5. Flatten the circles and snip off one edge so that your pumpkin will sit flat. (See above)
  6. Open back up and gently push a piece of a cinnamon stick in the center of the the pumpkin for the stem.
  7. For leaves, you can punch them out with a leaf punch or simply cut a lead shape out like I did. If going for the classic look, use green for the leaves. Otherwise, mix and match for the look you want. Place a dot of glue on the back of the leaf and place it just inside the pumpkin.
  8. Extras: I decorated the shimmery orange pumpkin with two amethyst-colored glass beads, tied on to thin beading cord. For the plum pumpkin, I cut leaves in each of the three colors I was working with and attached them to each other with a little brad (an eyelet would also work.) I gently pushed the open bracket into the cinnamon stick. For a curly vine, just cut a thin and long piece of cardstock, twirl it around your finger and glue just inside the pumpkin. 
  9. A few ideas for decorating: place your lil' pumpkin(s) in a decorative dish, on your mantle or tucked in and around picture frames. They also make great place card holders for a lovely Fall dinner. Enjoy!

Friday, October 7, 2011

Crafting a Joyful Note

I am very fond of this Arctic stamp set from ink+wit. (More whale whimsy here.) Wouldn't it be fun to make your own card with this set? Then imagine sitting down and penning a hand-written note to a loved one using this Ice Blue Tornado pen. And, of course, a beautiful card deserves a beautiful envelope so decorate it with a bit of Japanese Washi tape and top with a vintage stamp. Imagine the surprise and pleasure your hand-crafted goodness would create on the other end. Joy to make. Joy to receive. Bliss.


Tuesday, October 4, 2011

Cityscapes

I love cityscape prints. Isn't this New York print adorable? I found some scrapbooking paper with a coordinating cityscape and street map design. I turned them into these coasters. They add a cheery pop of color to our coffee table. 

Tuesday, September 27, 2011

Trade Fair

Earlier this summer, when my brother and his family came to visit, they shared a super fun family tradition with us. It's called a Trade Fair. Everyone who wants to participate creates, by hand, some items to trade at the fair. Your offering can be made up of all the same items or a smorgasbord of different treasures. It's a crafter's dream!
I picked up this little brag book at the Trade Fair.

Here's how it works: you make the same amount of items as there are participants. Then you lay your goods out on a blanket and take turns trading with each other. Think open air market style. Then let the trading commence!

At our trade fair, children and adults alike were eager (read that how you will) to get their hands on something they had spied on someone else's blanket. Back and forth the trading went. We had items ranging from metal garden art to origami to clay creations to jewelry to paper crafts to goodies in a jar. It was so interesting to see what everyone came up with. And one of the most fulfilling parts for me was the challenge to create and come up with something new. I made jewelry and clay figurines and I threw in a sketch or two. I look back and realize this was probably one reason I melded jewelry making and working with clay into the hand-crafted jewelry you'll find in my shop.

We're looking forward to next year's trade fair and we're already thinking about what we'll create this time.